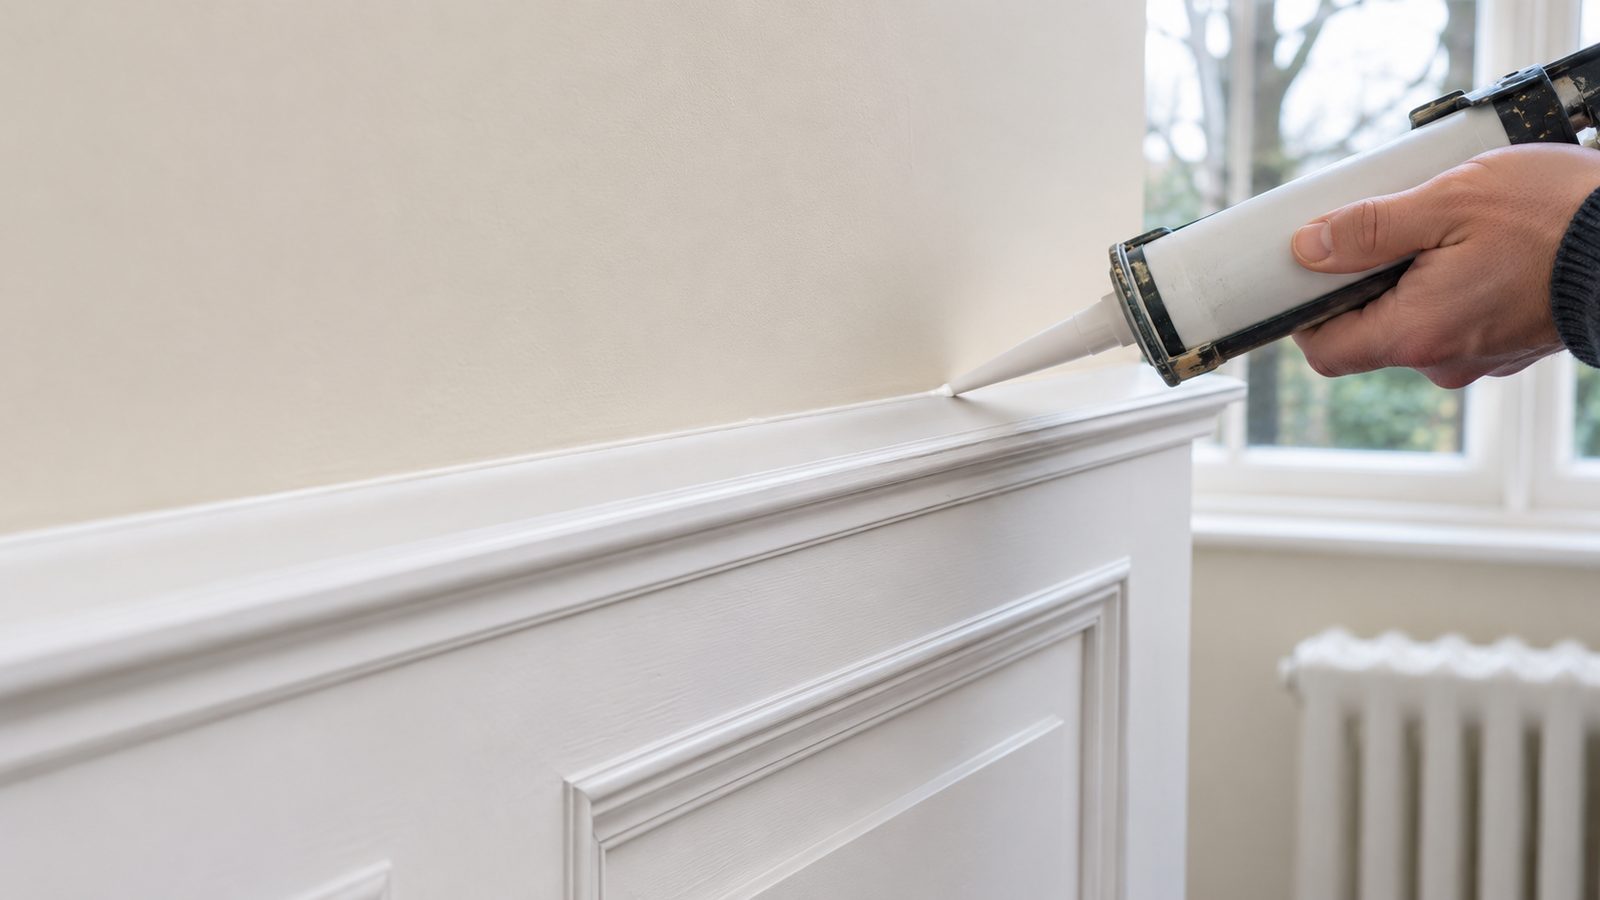
Short answer: most wall panelling cracks along the joints because the caulk or filler cannot cope with movement. When the heating comes on, the wall, the panels and the air all dry out at different rates, and a rigid filler or a thick bead of caulk splits. A thin bead of flexible, paintable decorator's caulk, left to cure fully before painting, fixes most of it.
Cracks are not the only wall panelling problem. We read through homeowner forums and DIY threads from Ireland and the UK, and the same seven problems come up again and again. This guide explains what causes each one, how to fix it, and when it is a sign the panelling was not fitted properly in the first place.
Wall Panelling Problems at a Glance
- Cracked caulk at the joints: Caused by seasonal movement and rigid or thick filler. Fix with a thin bead of flexible, paintable caulk, cured fully before painting.
- Gaps between the panels and the wall: Caused by uneven walls. Small gaps can be caulked; larger ones need the panel scribed or packed out and refitted.
- Panels coming away from the wall: Caused by glue-only fixing, poor wall preparation or damp. Remove, fix the cause and refit with the right adhesive and fixings.
- Peeling or fuzzy paint on MDF: Caused by the wrong primer on cut edges. Sand back and use a primer made for MDF.
- Nail holes and joins showing: Caused by filler shrinking. Fill twice and sand flat before priming.
- A layout that looks wrong: Caused by measuring once and not planning the spacing. Usually needs refitting.
- Damp smell or mould: Caused by panelling over a damp wall. Remove the panels, fix the damp and let the wall dry fully.
1. Cracks in the Caulk Along the Joints
This is the most common complaint by far: thin cracks along the top rail, where the panelling meets the wall, or in the corners of each frame. It often shows up in the first winter after fitting.
Why it happens:
- Movement: Central heating dries out the room. MDF, timber and plaster all move slightly as temperature and humidity change, and the joints between them take the strain.
- The wrong product: Rigid filler or a cheap caulk in a joint that moves will crack. So will a caulk that is not labelled paintable.
- Too much caulk: A thick bead shrinks more as it dries and pulls away from the edges. A thin, neat bead holds better.
- Painting too soon: Paint over caulk that has not fully cured can craze and split as the caulk underneath shrinks.
How to fix it: Cut out the cracked caulk with a sharp knife, wipe the joint clean, run a thin bead of flexible, paintable decorator's caulk, smooth it with a damp finger, and let it cure for the full time on the tube before touching up the paint.
2. Gaps Between the Panelling and the Wall
If you can see a dark line or slip a fingernail behind the top rail, the panel is not sitting flat against the wall.
Why it happens: Very few walls in Irish homes are truly flat, especially in older houses and in homes that have been replastered. A rigid panel fixed straight onto a wavy wall touches the high spots and leaves gaps over the hollows.
How to fix it: Small gaps of a millimetre or two can be caulked. Bigger gaps cannot: the caulk sinks, cracks and shows. The proper fix is to take the panel off and refit it, either scribed to follow the wall or packed out on battens so it sits flat. A good installer checks walls with a straight edge before fitting, so this is dealt with on day one.
3. Panels Coming Away From the Wall
A panel that bows, lifts at one end or sounds hollow when tapped is losing its grip.
Why it happens:
- Adhesive only, on the wrong surface: Glue on its own struggles on dusty, flaking or glossy painted walls, or on old wallpaper.
- Not enough fixings: Panels on stairs and in hallways get leaned on and knocked, so they need adhesive and mechanical fixings that suit the wall, whether that is block, plasterboard or older lath and plaster.
- Damp: Moisture behind the panel breaks down the bond.
How to fix it: Do not just add more glue behind it. Remove the panel, find the cause, prepare the wall properly, and refix it with the right adhesive and fixings. If damp is the cause, that has to be sorted first.
4. Paint Peeling, Flaking or Looking Fuzzy
Paint that peels off in sheets, or a rough, furry texture along cut edges, is usually a primer problem rather than a panelling problem.
Why it happens: Cut MDF edges are very absorbent. A water-based primer that is not designed for MDF soaks in, swells the fibres and leaves a fuzzy surface, and paint on top does not bond well. Painting over dust, or over a glossy surface that has not been keyed, causes peeling too.
How to fix it: Sand back to a sound surface, prime with a primer made for MDF, sand lightly again, then apply your top coats. RS Interiors leaves every job filled, caulked and sanded, ready for your painter, and we are happy to talk them through what suits the panels.
5. Nail Holes and Joins Showing Through the Paint
Little dimples where the nails went in, or a visible line where two lengths of rail meet, make panelling look cheap up close.
Why it happens: Filler shrinks as it dries. One pass looks flush when wet but sinks below the surface once it dries, and the paint then shows the dip.
How to fix it: Fill, let it dry, sand it flat and fill again. Two passes and a light sand before priming give a joint you cannot see. This is one of the most time-consuming parts of the job, and the step DIY and rushed jobs most often skip.
6. The Layout Looks Wrong
Frames that are different widths, a rail that drops or rises along the wall, or panelling that looks too low or too high are all layout problems.
Why it happens: The wall was measured once, the spacing was not worked out around doors, switches and radiators, or the rail height was not set to suit the room and the pitch of the stairs.
How to fix it: Layout problems cannot be filled or painted away. Short sections can sometimes be adjusted, but a badly set-out wall usually needs refitting. Measure twice, mark the full layout on the wall before fixing anything, and see our guide to hallway and staircase panelling for the height rules we follow.
7. A Damp Smell or Mould Behind the Panelling
A musty smell, dark marks along the bottom edge or panels starting to swell are signs of moisture behind the panelling.
Why it happens: Panelling fitted over a damp wall traps the moisture behind it. It can come from rising damp, a leak, or condensation on a cold outside wall.
How to fix it: Take the affected panels off, find and fix the source of the damp, and let the wall dry out fully before anything goes back up. In kitchens and bathrooms, use moisture-resistant boards. Never fit panelling over a wall that is already damp.
Small Fix or Badly Fitted? How to Tell
Some of these are normal maintenance. Others are signs the panelling was not fitted properly. Here is a quick way to tell the difference:
- Usually a small fix: Hairline cracks in the caulk after the first winter, an odd nail hole showing, or a small chip from a knock.
- Usually a fitting problem: Gaps you can see into, panels lifting or bowing, rails that are not level, and the same cracks coming back after you have re-caulked them.
- Always get it checked: Any sign of damp, mould or swelling, and any panel that moves when you press it.
Our guide to maintaining your interior panelling covers the simple upkeep that keeps panelling looking new, and how long wall panelling lasts explains what to expect over the years.
How RS Interiors Prevents These Problems
Every one of these problems is easier to prevent than to fix. This is how we do it on every job:
- We check the walls first: For damp, for cables and pipes, and for how flat the wall is, before anything is fixed.
- We fix panels properly: With adhesive and fixings that suit your wall, so panels on hallways and stairs stay put.
- We fill, caulk and sand every joint: So the panels are ready for your painter, with no nail holes or joins showing.
- We set out the layout on site: Even frames, a level rail and the right height for the room.
- We stand behind the work: We put right any defects caused by our workmanship, and we offer touch-up visits and maintenance advice.
RS Interiors is a wall panelling company based in Ratoath, Co. Meath, with over 10 years of experience, and panelling is all we do. If your panelling is cracking, gapping or lifting, contact us with a few photos and your Eircode, or message us on WhatsApp, and we will give you our honest view on whether it needs a simple fix or a refit. We work across Meath, Dublin and the surrounding counties.
3 Main Takeaways
- Most wall panelling cracks at the joints because of seasonal movement, so use a thin bead of flexible, paintable caulk and let it cure fully before painting.
- Gaps behind the panels, panels lifting and rails that are not level are fitting problems that caulk and paint cannot hide.
- Check for damp before panelling goes up: panelling over a damp wall traps moisture and leads to mould, swelling and lifting panels.